Wednesday, January 7, 2015

Christmas Dress - 2014

Earlier in the year, I made 5 bridesmaid dresses that used 36 yards of tulle each. (I'll have a post coming about that adventure soon!) It was crazy and labor intensive, but I just loved the volume and airiness of the skirt. You'd think I'd be sick of tulle after all that, but instead I was inspired to combine rich, red velvet and a frothy black and white dotted voile I had on hand, along with the tulle underneath for volume to create a fun and festive Christmas dress for myself!


As I mentioned in my capelet post, I also loved the idea of having a red velvet capelet to go with it. That part was much more difficult than I'd expected! But first the dress...

I gathered various inspiration pics, mostly of red velvets and white tulles together.


And some capelet inspiration!


Originally I was thinking of having a two-tiered skirt, like this one:
 
 
But after starting the process of adding the top tier, it was getting messy and difficult, and I felt there was enough fullness with just the bottom tier so decided against it in the end.
 
As for the bodice, I decided to go with a simple V-neck crossover, and used the bodice from New Look 6557, view B.


Usually crossover necklines want to gape and pull over my full bust, but I was impressed with this pattern, it actually sits really nicely and covers well!
 
For the skirt, I used the same pattern I'd used for the bridesmaid dresses I mentioned above, McCall's 6466. By now I could do it in my sleep! I just used 4 layers instead of 6. Sewing yards of tulle always turns into a mountain of fluff! 
 
 
I finished just in time to wear the dress to the ballet - The Nutcracker, a yearly tradition. 
 
 
I threw on a black cropped sweater I had in my closet, and a black velvet vintage had I'd recently acquired (along with my first hat pin!)
 
 
After that, I had a few days until Christmas itself, plenty of time to whip up a simple capelet! Or so I thought...it started out alright, I used Butterick 5032.
 
 
The pattern is really very straight forward. The problem was the fabric! I was using the red velvet, and a lining fabric, and they did not want to stay together. I managed to get it done, and make it passable to wear, but from close it looks awful and pulls in all kinds of strange ways, which you can see a little on the corner and edge here. 


Fortunately, you can't really tell too much once it's on.


 It was still fun to wear, but I think I actually prefer the black cropped sweater with the dress in the end. I look forward to trying out the capelet in an easier to sew fabric soon enough, though!
 
 
Despite the slight disappointment of the capelet, overall I was pleased with the end result. I got quite a few comments from people while I was at the ballet and at dinner afterwards, so I suppose I can call it a success!


Monday, January 5, 2015

Pinspiration Monday - Capelets!

So lately I've been obsessing over capelets! I keep drooling over vintage dresses with matching capelets made of velvet or chiffon or wool, attached or separate, in all variations. Partly what I love about them is their versatility and wide use in fashion from Victorian times to the 30s to the 50s and more. I even ended up making one to go with my Christmas dress, which was sort of a disaster but more on that in a future post. :-)

Here are some of the lovelies I found on Pinterest!


This last one is actually a pattern you can get from Decades of Style, and I have to say I'm extremely tempted. I love the buttons, the fitted bodice in combination with the capelet, the color of the drawing, just everything about it! Looking forward to adding more capelets to my wardrobe eventually, and I'm sure I'll keep pinning inspiration as I find it in the meantime. If you'd like to follow me on Pinterest, I'm here. :-)

Friday, January 2, 2015

Instagram Friday

A photo posted by Stephanie Lochet (@slochet) on

This was a lucky find at the local gift shop where I rent a booth, Austin Gift Company. When I'm there restocking or tidying up my booth, I often can't resist walking around and seeing what the other vendors have for sale. There are all kinds of crafts, jewelry, handmade soaps, candles, and lots of vintage resale booths as well. This adorable hat actually matched the outfit I had on when I found it, and even fit my hairstyle that day perfectly, so it was definitely calling my name. Then I saw the price tag - a mere $15 - and I was sold!  I just love finding little treasures like this, it totally made my day! :-)

Thursday, January 1, 2015

New Year, New Look!

Photo courtesy of the Daily Mail

So one again it's been quite a while since my last post, but for good reason! I've been busy sewing up a storm this past year, and getting more and more comfortable using patterns and making clothes, both for myself and other people! I also gave my Etsy store a name change, from Aux Belles Choses (which was often hard for people to understand and a nightmare to spell, lol) to the much simpler S. Lochet Designs, and a makeover to accompany it, which I'm quite pleased with. I decided to keep my blog name the same, as it expresses exactly what I love to blog about - beautiful things!
I could call 2014 the Year of Dresses, as I made a grand total of 20+ dresses! Somewhere around 10 for myself, and at least 10 dresses for other people, including 5 retro inspired extremely poufy tulle bridesmaid dresses, which I'll be posting about soon. This is definitely a personal record! As I've gotten more comfortable making dresses, I've missed sharing the process with the blogging world, but I just hadn't gotten back in the documenting habit quite yet. This year, though, I definitely want to change that and I'm planning on documenting much more of my sewing to blog about regularly!

In addition, I plan to have some recurring weekly blog posts, one just sharing "Pinspiration," pretty things found on Pinterest that inspire me. (If you'd like, you can follow me on Pinterest.) I also plan to share some of my Instagram shots, which often tend to be in the middle of sewing projects. (@slochet on Instagram.) These are easy, quick posts that I know I can stick to because they won't take much time, but which totally relate to my creative process and will hopefully keep my blogging momentum going.

I'm very excited about this year, and I can't wait to start sharing more of my sewing projects! As for what I'll be sewing, I think I might want to start with something I've never sewn before - a coat! I'd love to hear your own sewing plans for the new year, dreaming up new potential projects is probably my favorite part. :-)

May your 2015 be filled with happiness and creativity!

Sunday, February 9, 2014

My First Franken-Pattern Dress!

Long time no blog! As usual I got bogged down in current events, but I've had several posts in my head just waiting to be written. One of them has been about the making of this dress!


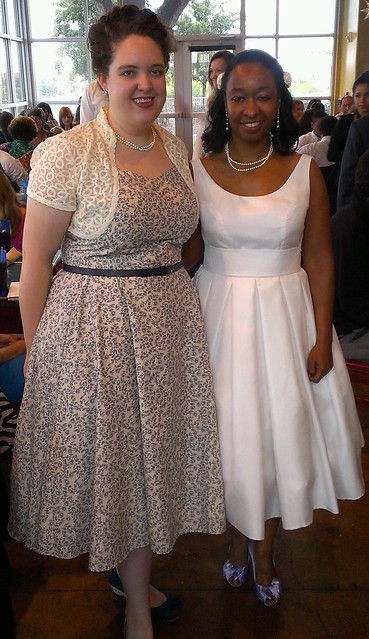
I actually made this dress (extremely last minute, as usual) for my friend Robyn's wedding, whose wedding dress I made and blogged about here, so you've already seen a pic of me in it. I'm adding a few more pics, though, and wanted to share how I spliced it together.


The skirt is using the pattern of the overskirt in Butterick 4790, the Walkaway Dress. This was one of the very first patterns I used, and the very first Retro Butterick pattern. I really loved the shape of the skirt, especially how most of the fullness was on the sides and back.


Of course on the original it splits in front revealing the underskirt, but I just decided to use it as a regular skirt pattern and attach it all together (with the addition of an in seam pocket! All full skirts should have pockets!)

For the bodice, I used McCall's 6599, altered the neckline to a bit of a sweetheart shape and omitted the sleeves. It's not a particularly retro style, but it was just the simple princess seamed bodice I wanted.


I used a cotton poplin with a simple small blue floral print all over. The princess seams made it extremely easy to adjust and fit well. I fully lined the dress with a cotton muslin.


I have been SO pleased with this dress, it is hands down my favorite. I wear it all the time, and it is extremely comfortable. The cotton breathes well in the Texas heat, but it's easy to throw a sweater over for cooler weather as I did during our trip to France this past summer!


 It looks great with a belt or without, with a cardigan or without, and I've even thrown a sweater on top so it looks like a top and skirt. I just love the abundance of skirt and how it swishes when I move. I think I love this dress most of all because I feel like it fits me the best of any garment I've ever made, which makes me want to keep sewing and working at getting the best fit possible for all my clothes! It really is amazing how great a well-fitting garment makes you feel.


Thursday, July 11, 2013

Robyn's 50s Inspired Wedding Dress

Last year, my friend Robyn sent me a picture of an adorable 50s tea length dress and asked if I knew anyone that could recreate it for her upcoming wedding, or if I would be able to. At that point, I still hadn't used many patterns, and I had never fitted anyone other than me for a dress. So my first reaction was, there's no way I'm experienced enough yet to make such an important dress! However, I absolutely fell in love with the dress she had chosen, and I just had a strong urge to say yes anyway to challenge myself, and so I did.

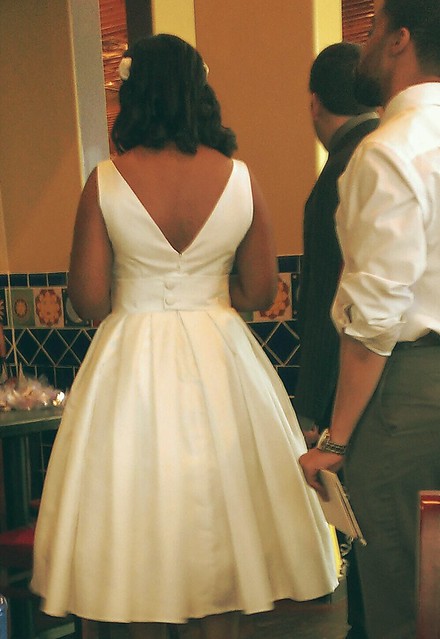
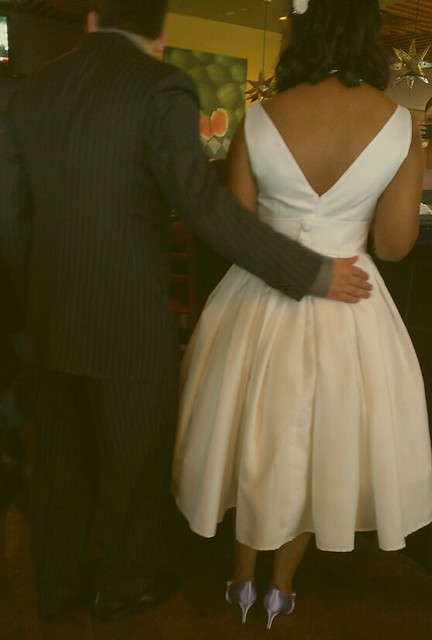
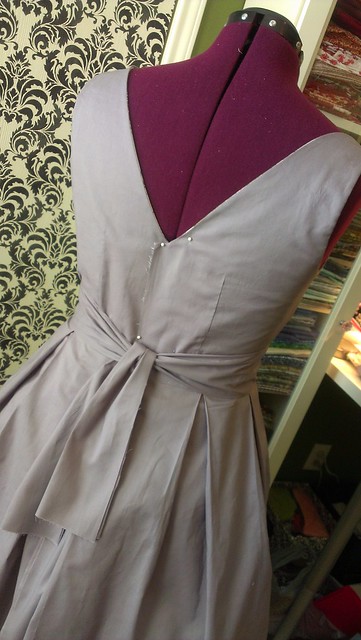
The dress she wanted had a simple, sleeveless, fitted bodice with a scoop neck and low V back. The full tea length skirt was made with box pleats, which I love and knew I could do for sure, it was just getting a lovely fit on the bodice that had me a bit nervous. I decided to find a pattern with a simple bodice that could be easily altered as a starting point. So we went to the fabric store together, flipped through the pattern books, and settled on Butterick 5748. In hindsight, that probably wasn't the best choice, but more on that later.

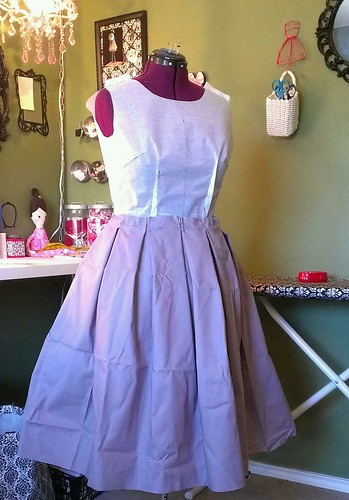
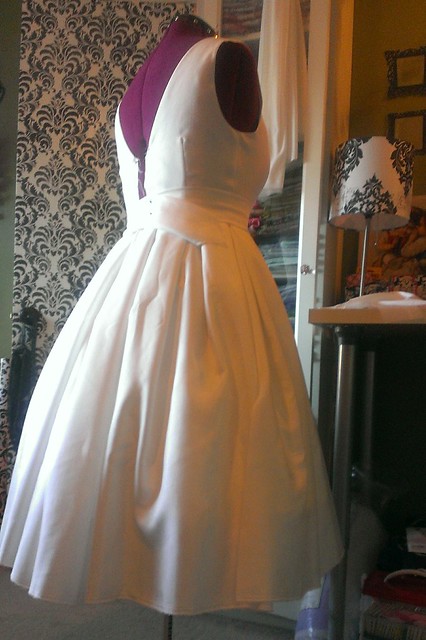
I sewed up a quick version of the bodice and altered the neckline to make a deeper scoop in front and to be a V in back. I pleated and pinned some broadcloth on my dress form just to get an idea of the whole look together.


At the first fitting, I was mainly looking to see if my neckline alterations were going to work, and they looked pretty good! But the rest of the fit was kind of a mess. The bodice needed to be shortened significantly, by a couple inches. Also, the fit was not as form fitting as I'd hoped. I now realize that the pattern we chose is not meant to be extremely form fitting, so that was probably not the best choice. But I adjusted the darts under the bust to be more diamond shaped in an attempt at getting a closer fit.

The next round of fitting seemed to go pretty well, I made two versions of the bodice with two different sets of alterations, and one seemed to do the trick. I figured I was ready now to make it with the real fabric!

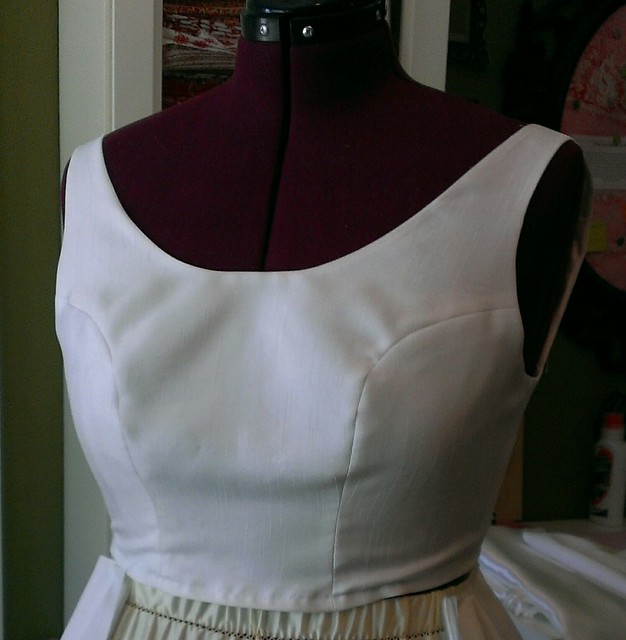
So I made up the bodice in the fabric itself, and it looked great on my dress form, but I was a bit disheartened to see it did not look so great on my bride. The darts were not very flattering at all and seemed much more apparent in this fabric than the toiles I'd made up.


I did some research, and realized I would likely be having much better luck with princess seams than with darts. So I found a couple tutorials on converting darts to princess seams, and went at it. I worked on it late into the evening, and had Robyn come back the next day hoping this would do the trick. I was amazed at the difference it made, the fit was so much better, exactly what we were looking for! (Princess seams weren't pressed yet in this pic!)


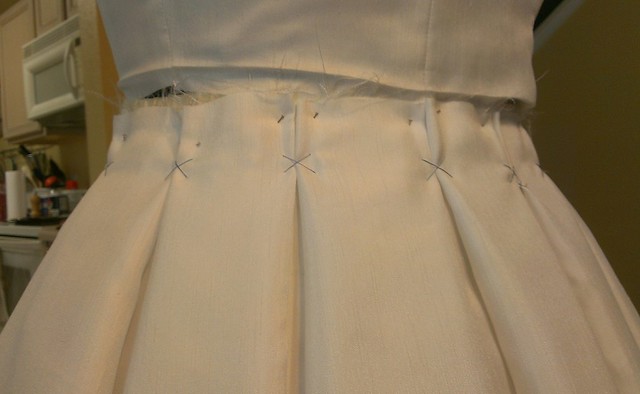
Once I had the bodice done, I started working on the skirt. I must have re-pleated the skirt 4 or 5 times, trying to get the pleats just right. Robyn left her petticoat with me so I could make sure the skirt fell nicely over it. I pinned the the pleats on my dress form, and then hand stitched them together with cross stitches once I was satisfied to make it easier to sew to the bodice.


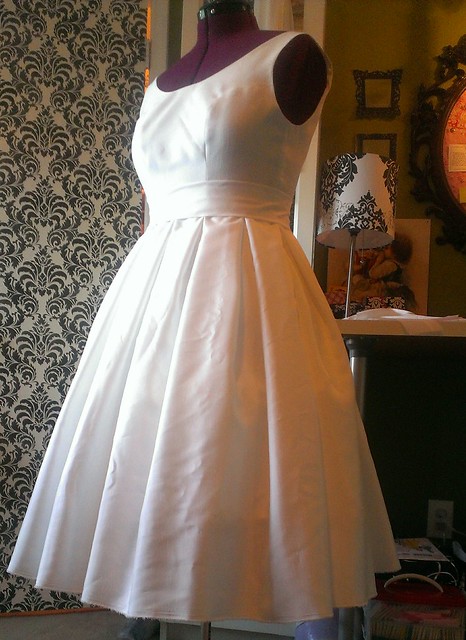
Finally, my bodice and skirt were attached and looking very much like I'd hoped! It was all pretty exciting. I whip stitched the lining to the skirt, trying my best to make it look as pretty as possible on the inside.


I inserted an invisible zipper once I measured several times to make sure the fit was good, and then I hemmed it with a very small hem after deciding on the exact length for her.

The last part of the dress was making a wide belt that closed with two fabric covered buttons in the back. My first attempt fit well, but the seam was slightly visible as a bump in the middle. The second attempt ended with a strange wrinkling across the belt when it was pulled. I had cut the fabric and the interfacing on the bias, same as the first time, but for some reason something went wrong! So I made a 3rd belt, which was just right, except for the buttons needing to be repositioned after somehow not measuring carefully enough and making the belt a tad too loose. Finally, after many hours of back and forth to my place and her place, about 3 days before the wedding (cutting it close much?!?!?!) everything was completely finished.

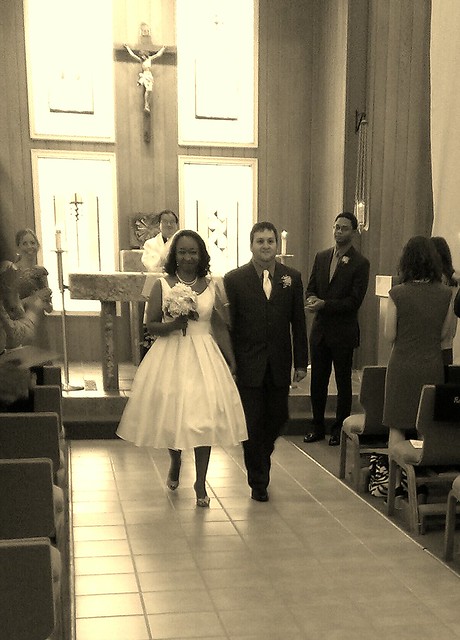
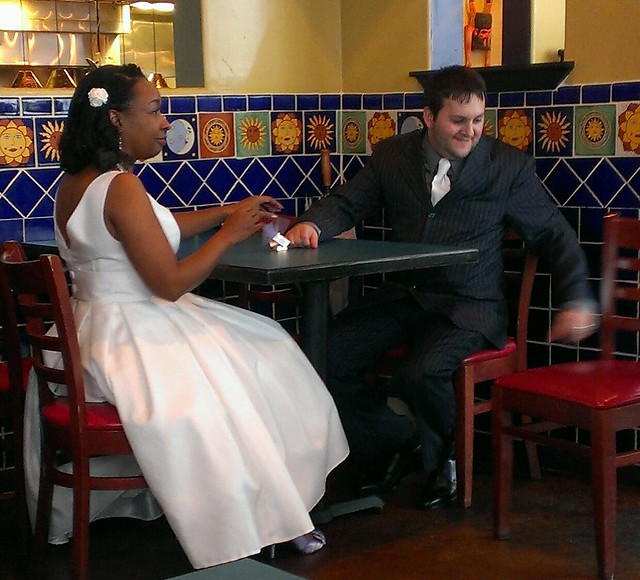
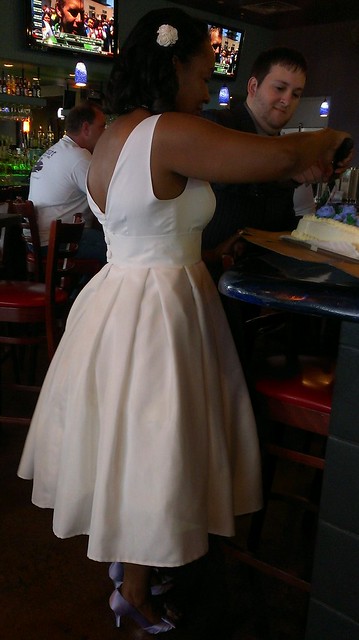
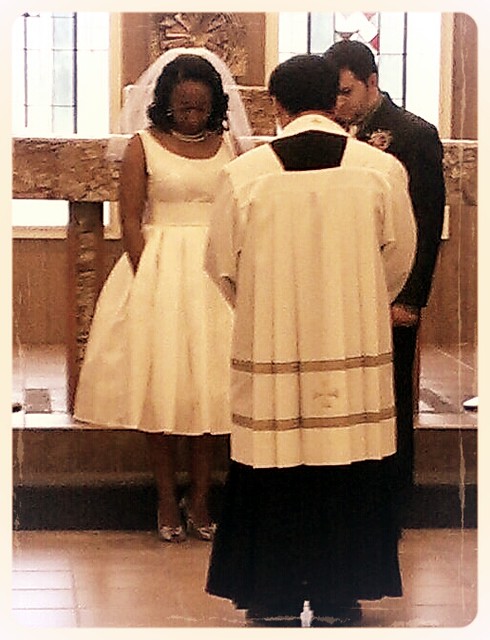
The bride looked beautiful on her wedding day, and I was so pleased that she was pleased!


Oh, did I mention there were pockets? They came in handy for those inevitable tissues needed for happy tears. :-)


I also made the groom's tie using this tutorial, which was a first for me as well.


I learned a lot through this whole process, especially about fitting, and I'm thankful to my friend for having faith in my abilities and trusting me with such an important garment. It was an honor to create!