Showing posts with label Decor. Show all posts

Monday, May 23, 2016

Sewing Room Redo Progress

If you've been following my Instagram, you already know I've been super busy with renovating my sewing room! It's essentially my birthday present this year. I keep meaning to share some pics here, but just haven't had a spare second until now.

Here you can see my old wall color, a lovely olive green that I enjoyed for many years.

Lately, though, I've been craving something lighter, so up went the primer and new paint color! I used Flora by Behr, it's a really lovely soft green with hints of blue or gray depending on the light.


I didn't start out planning to redo the floor, but I started dreaming and checking just for fun, and found a very budget friendly option for wood laminate at Home Depot ($0.64/sq ft!). Even more importantly, I mentioned the possibility to the hubby, since he would be the one doing the majority of the work, and he was not opposed! So that's what we spent my birthday weekend doing. :-) It makes SUCH a difference!!


We got rid of both bookshelves in the room, as well as the old computer desk, and I decided to replace all of them with Ikea's Algot system of wall shelves. I love how customizable they are, and how light, airy, and open the room feels now! I need to go grab a few more shelves to finish it off.


Another thing I'm excited about is my picture taking space. I've never had one great place with natural light to take pics of my projects. I realized where one of the bookshelves used to be would be perfect because it's right across from the windows. So I decided to paint some faux moulding as a backdrop for my projects. I'm sure you'll be seeing this wall frequently on the blog!


I decided to repurpose my ung drill frame, which I'd used as a fabric covered cork board, to a decorative frame on the background wall. I asked my collective Facebook friends for opinions on keeping it black or painting it white, and got the excellent suggestion to paint it gray, which continued a theme I already had going! I ran out the same day to get paint and did just that. :-)


These were some of my other gray themed accessories, a new gray table, gray striped curtains, and a gray striped ironing board cover. I was also able to use some vintage Barbie fashion prints from an old calendar that I loved...still debating adding a couple more!
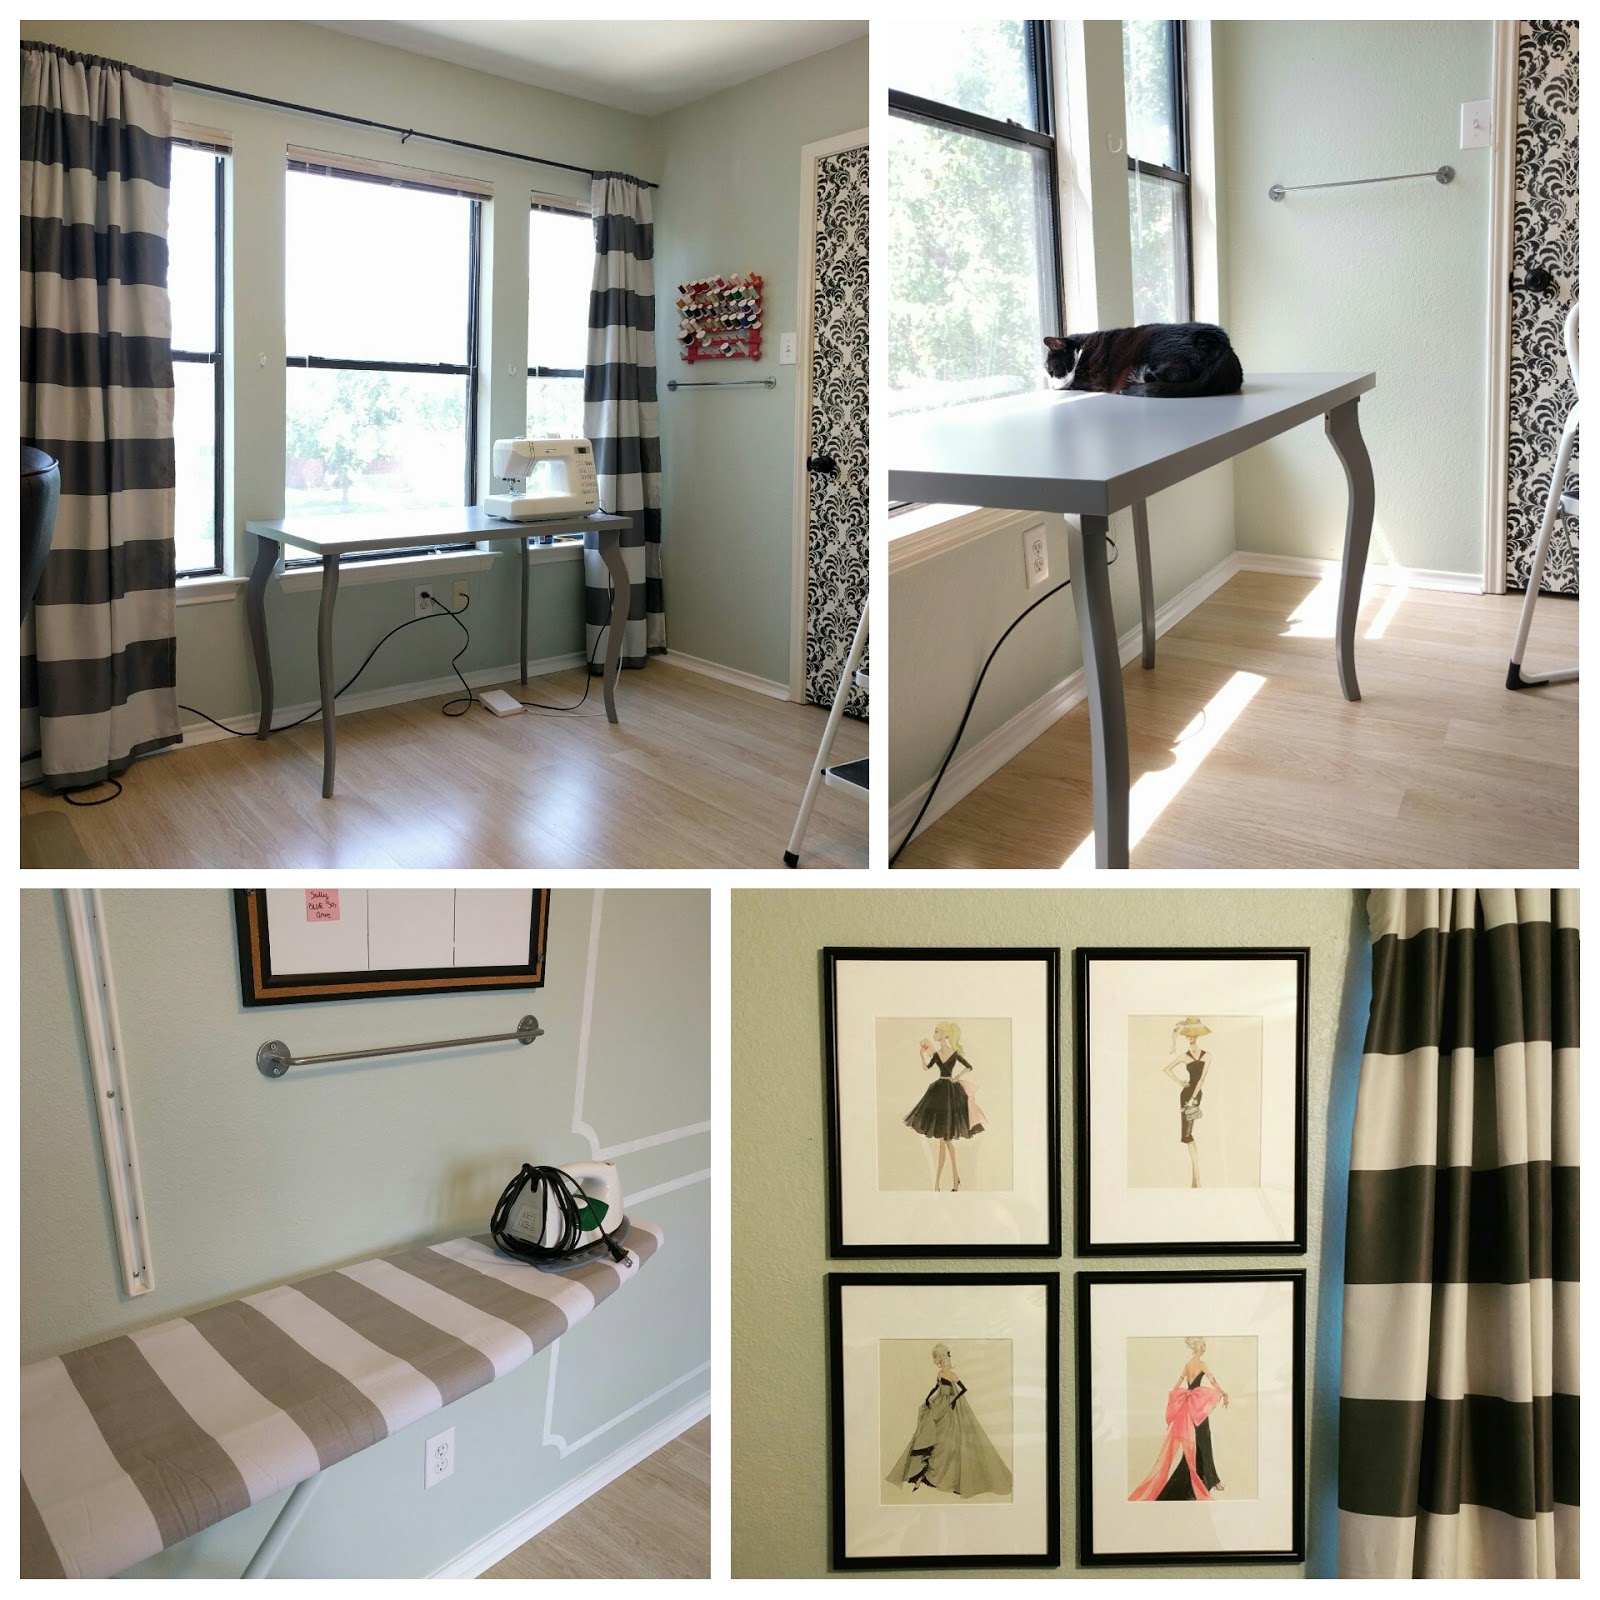

And that's about where I am now! I have to start the task of moving all the stuff back in, which is not a small job. I'll be sure to share more pics when everything is back in place!

Wednesday, June 10, 2015

DIY Chair Covers & Decor


A few years ago, we replaced our carpet with laminate flooring. My husband spent his whole week of vacation installing it with minimal help from me, and he did a great job! I took the opportunity to kind of redesign our entryway and reading area, and I had grand plans to get some gorgeous oval backed Louis XVI style chairs, and all kinds of other things...but I ran out of money, and had to make do with what I had, which were these...

Plus a cat!

...some old rickety chairs that came with a cheap table set from Walmart during our college days. I figured I could at least pad them a little and do what I do with all kinds of other things, cover them with pretty fabric! I'd never made chair covers before, but I figured it couldn't be too hard.

So I got my padding, fabric, and got to work! (Sorry for the fuzzy pics, these were all taken with an old phone a few years ago with bad lighting.)


I used good old duct tape to attach the foam, fancy!


And then just started kind of cutting pieces and forming them around the chair.


I knew I wanted to use box pleats on the bottom, and originally I planned them to be long enough to cover the ugly metal legs. But when I made it up it just didn't do it for me, it reminded me of a grandmother's dress or something.


So I chopped off some of the length, and thought they looked muuuuuch better!


The back I decided to close with some self covered buttons!


 I was pretty happy with the end result! They weren't Louis XVI chairs, but they were much prettier than what they were before.


I also had a big armchair, a favorite of the kitty (with the scratches to prove it!) and I covered with just plain muslin...


I just fitted and pinned as I went, added pleats to match the other chairs...


...and my favorite part, a big blue bow in back, which made it easy to fit snug!


One other little detail I did on the cheap was to stencil the back of the bookcase, didn't cost much!


Overall, I love my little reading area! Considering I didn't have a lot to spend at the time, I'd call it a success.

Wednesday, May 13, 2015

French Macarons Table Décor


So a few weeks ago I was invited to a ladies' brunch, at which there would be a contest for best table décor. I thought that sounded like fun, and was excited to be able to decorate one of the tables. I looked around on Pinterest, and decided on a kind of hybrid between Coco Chanel and Macarons! I love the black and white stripes with blush pink accents of Chanel, and the lovely colors of macarons.

At first I had an idea for a centerpiece to use a little mini dress form/pin cushion I have, and make a dress for it out of my leftover pink silk! Something like this...


But I ended up kind of deciding against it as it was a bit too tall and would end up more as a visual obstruction than anything.

I decided on a fun little plate setting with a napkin bow! (All of this was from Dollar Tree!) I saw some adorable striped placemats at Ikea, but then figured out I could just use striped scrapbook paper for the placemat as a cheaper option. Worked perfectly!


Each place setting got its own wrapped maracon. :-)


In addition to the macarons, I picked up some French style pink lemonade from Trader Joe's, meringues, salt water taffy, mints, and just happened upon a lovely shade of pink marshmallows, lol.


I lucked out the day before and found some gorgeous daisies, hydrangeas, and carnations in just the shades of pink I was looking for.


I did my arrangements the night before, used more stripey scrapbooking paper for some of the containers...


I was really pleased with the overall outcome!


Unfortunately I didn't win best table, but I did get to enjoy the lovely flowers for the next week or so! They stayed in my sewing room where they brought a smile to my face. :-)