
 With the holidays coming up, I thought it would be fun to have a series of tutorials during the month of November! I know I'm always looking for new things to make for holiday gifts, so I hope these tutorials give you a few little ideas. :-) I'm going to aim for posting one a week during November.
This is my first tutorial ever, so I hope it's clear and easy to follow! Please let me know if you have any questions. In this tutorial I'm going to show you how I made the magnet boards for the Bird Fabric challenge several weeks ago.

- 1 burner cover (check the dollar store or local discount/thrift store)
- Spray paint (optional, but recommended if your fabric is light colored)
- Fabric large enough to cover burner cover
- Mod Podge or any decoupage glue
- Paint brush or sponge to apply glue
- Scissors (preferably fabric scissors for a nice clean cut!)
- Coordinating ribbon to hang
- Drill or some way to make holes
- Sandpaper to smooth edges of holes
- Decorative magnets (I'm planning on making a tutorial for some lovely magnets soon!)
First, you'll need to make holes along the top rim of the burner cover. Obviously the one I used here is square, so I just centered them, but most covers you'll find are round and the great thing about those is you can't really go wrong with the hole placement. I just eyeballed it and made some marks with a permanent marker, and then I had the hubby help me drill holes, lol, because I'm not so good with the power tools!
 Once your holes are made, use the sandpaper to make sure you don't have any sharp edges around the holes. (If you're good with a drill, you can try to take any sharp pieces off with it, but proceed with caution or you might end up with bigger holes than you intended!)
If your fabric is light colored and you think the pattern on the burner cover might show through, it's a good idea to spraypaint them before covering them. If that won't be a problem, feel free to skip this step!
I just used some matte white spray paint, laid the covers on some newspaper in my garage and went to town...


First coating...

Second coating looked good to me! (NOTE! Be sure to spraypaint in a well ventilated area, this stuff can get stinky.)
 Once you're sure the paint is all dry, we can start decoupaging!
First, you'll need to make sure your fabric is the right size. I just traced around the burner cover, and then measured the width of the edge, and added that to what I traced. (Sometimes only visually because I'm lazy, but remember it's better to have too much fabric than too little!)

Once your fabric is cut and ready to go, try to center the cover and make sure you have enough fabric around by folding up each side, like so...

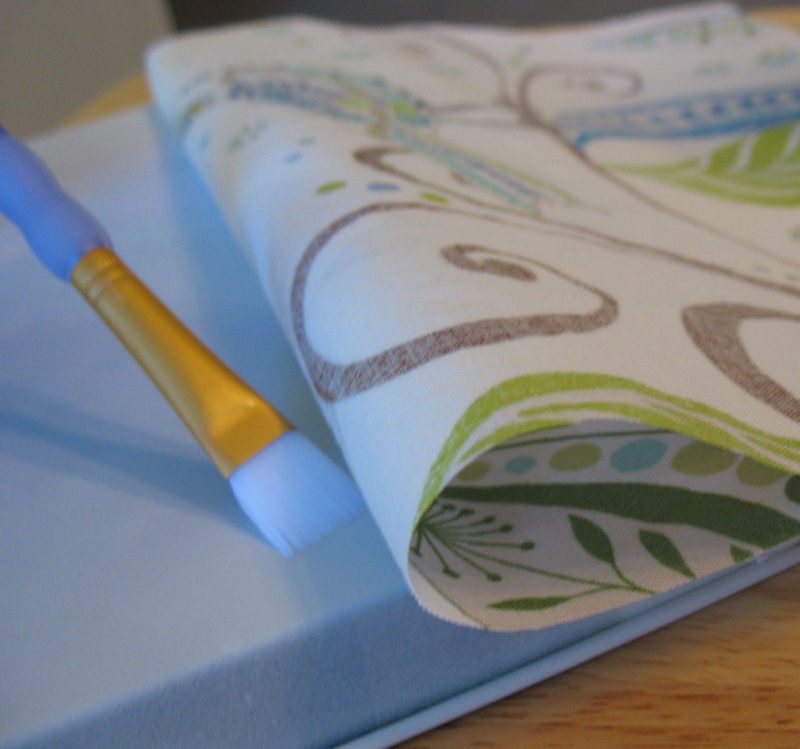
If you have a round burner cover, I'd start by gluing to the face of the cover first, being sure to center it well, and then going around the edges. With the square cover, I found lining up the top edge first was easier, so that's what I'll be showing here.
Starting at the top where the holes are, apply glue. As for how much, you don't want there to be tons so that the fabric is swimming in glue because then it won't stick quickly. Just a nice thin coat!

Then making sure to line up the edge of the fabric so that it is just under the lip, press the fabric down and make sure there are no wrinkles or bubbles.

With the square cover, clearly you'll have to navigate the corners. After gluing the fabric to the top edge, it should look something like this...

What I found to work best was to just cut the fabric on the natural curve..

resulting in a flap...

and then glue the flap around the corner.
 Do this on both of the top corners.
Next you'll be gluing the fabric to the face of the burner cover, so flip it over and peel back the fabric as far as it will go.

Apply a strip of glue...
And then press the fabric down, smoothing out any wrinkles or bubbles.

Repeat the process again, applying another strip of glue and pressing down, continuing until the whole face is covered with fabric.
For the bottom edge, you'll probably have a bit of fabric overhang so you'll need to trim the fabric down.
You could try to measure and trim that way, but I'm lazy so I just used a pen to mark where the crease is.

Here's a view of under the fabric, so you can see where I'm placing the pen.

Once you have your line drawn, cut along that line...

And you can see that it should fit perfectly.

Once that has been glued, cut the corner flaps on the bottom edge, and glue them like you did on the top edge.
 Now all you should have left to glue is the the sides. You may have some overhang, again, so mark and trim that if necessary.
Next you'll apply glue all along the side, and press the fabric down, paying special attention to the corners.

You might need to add some extra glue and manipulate the fabric a bit, but there's no right way to glue it down. Just kind of play with it and fold it until it settles and sticks.


 The perfectionist in you may say, "Ack! It's not perfect!" but tell her to hush. ;-) It's going to look fab!
Repeat the process on all 4 corners.
 At this point, if you see any little threads sticking up or bits of tiny overhang, you can try to use your nail to just push them down between the crease.
 If you'd like, you can then apply a coat of glue all over the fabric to give it a harder-feeling exterior. I tried both ways, and I ended up liking the softness of the fabric, so I didn't do it for this one, but feel free if you want to!
Finally, you'll need to cut holes in the fabric to match the holes you made in the cover. Use anything sharp, a pair of scissors works fine. You might want to hold onto the fabric where it is glued along the seam as you poke the hole, because it will tend to get pulled and want to come unglued. If it does, just dab a little glue under the fabric and press to stick it back in place.

Once you've made the holes, you can just apply some glue on the backside and press any loose threads down so that they dry flat. I also used a pen that fit through the holes to kind of push any unruly fabric to the back and press it down there.
Once the glue is dry, take the ribbon you'd like to use, and cut a nice corner so it will be easier to thread through the hole. Pull it through one side...

and out the other...

and then pull however much ribbon you want through both holes, being careful not to dislodge the fabric in and around the holes.
 Once you're happy with the amount of ribbon, pull it tight against the edge...
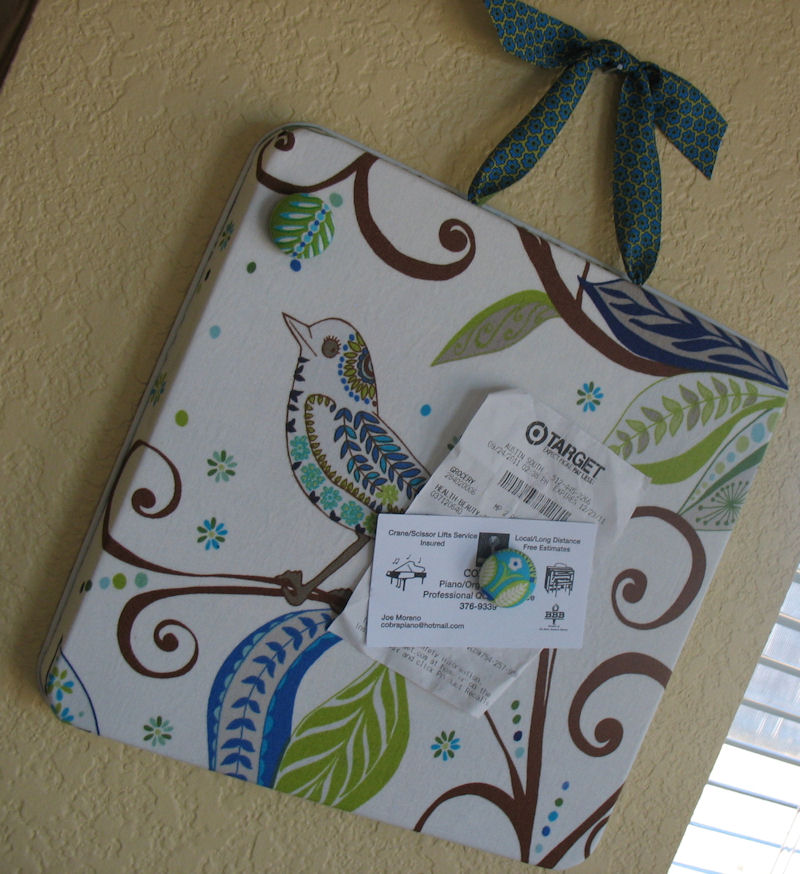
then tie a pretty bow, trim your ribbon's edges, and you're done!

Grab some magnets (or wait for my next tutorial where I'll show you how to make some pretty ones!), stick some stuff on your magnet board, and you're good to go. :-)
 Phew! That was a lot of pictures, lol, but it was fun! I hope this helps you out a bit, it would make a great gift for Christmas. :-) Of course, if you love the idea but don't want to do the work, I have several in my Etsy shop available, and plan to add many more in some fabulous fabrics very soon. (I find decoupage so therapeutic!)
 Do let me know if you have any questions or if something wasn't clear.
Happy crafting!

2 comments:
I was the recipient of this craft, and I can't speak highly enough of the cuteness and - most important to me - USEFULNESS of this project.
I have it hanging by my door so that if there's anything I have have have to do, I will see it every time I let the dogs out or leave the house.
This is a seriously groovy project!
Post a Comment