Showing posts with label Ideas. Show all posts

Wednesday, January 15, 2020

It's the 20s again!!

Happy New Year!! I am very excited for this year as I have a lot of plans and hopes to build up my sewing business and personal sewing repertoire.

On the business side of things, I've recently separated out my Instagram into personal (@stephlochet) and business (@slochetdesigns) accounts, hoping to get a bit better at regularly spotlighting items I'm listing for sale in my Etsy shop. I'll keep posts about sewing I do for myself on my personal account. I've recently lost some weight (around 40 lbs) and I'm hoping to lose more, so I'm guessing this year is going to be a bit strange for me sewing-wise, learning how to fit my changing body.

This also means I'm planning to list quite a lot of the me-made dresses I have in my closet for sale, as they're too big for me now. Many of these I only wore a couple times, just because I get distracted by shiny new patterns way too easily and use any excuse to make something new! So, keep an eye out a bit later in the year, probably as we head into spring, for listings of many of the dresses I've blogged about right here in the past!

As is typical in the new year, I've spent the last couple weeks cleaning up the post-Christmas sewing mess, and doing a bit of reorganization in my sewing room. On a whim, I decided I was going to start rolling up my quilting cottons for storage rather than folding. I felt it might be a better and more full usage of the space available, and I think it has proven to be true! I was able to fit all my quilting cottons, including a few piles that hadn't already been included, with a little room to spare. Here are some before and after shots!

Before, folded fabric piles sorted by color
Mid-organization, everything is everywhere!
All done!

I thought it might be interesting to show how I did this, as I'm very particular about the rolls being a uniform length. So I popped some true crime podcasts on, measured out the length I was going for with some tape, and went to work rolling. I took fabric that was already folded in half length wise (as it comes on the bolt) and then folded that in thirds length wise, keeping it in between the tape, and then rolled it up as tightly as possible. It did take me longer than I expected (a couple hours a day for several days!) but it was absolutely worth it.


And now, I'm itching to sew again! Tidying and organizing my sewing room never fails to renew my desire to create.


I haven't been great at blogging consistently the last couple years, but I'm hoping to change that this year as I have so many ideas and plans for my business, and will be very intentionally dedicating more time to it. I can't wait to share all the plans and creations I have in the works, including many with the new toy I got for Christmas...but more about that soon. ;-)

If you enjoy seeing my creations and would like to support my work, I'd love for you to follow my new business IG account @slochetdesigns, and/or my Facebook page. Thanks so much, cheers to 2020!

Tuesday, July 12, 2011

Toile Meal Planner

I recently decided I needed something to help me with my meal planning. I tend to put it off because, for me, the hardest part is just making decisions! It's mentally exhausting. On top of that, each time I sit down I have to recall what my choices are as far as meals go, and then remember all the ingredients needed, and then make a grocery list accordingly. It's mentally taxing to try to remember everything from scratch!

So, I decided first to take regular notecards, and write down all of my most common meals, along with the ingredients needed to make them.


These weren't recipe cards, I don't have instructions on them...just the name of the dish, and the ingredients. I bought an inexpensive plastic notecard box at an office store to store the cards in.

Then I bought some vinyl, cut it in strips, used binding tape on the edges and sewed it to some fabric to make clear pockets for the cards.


I made six rows of 4 pockets, and in the first slot I placed a card with the day of the week on it.


And finally, sewed a few loops of ribbon along the top for hanging.


Now, all I have to do when it's time to plan meals is to flip through my box of notecards, rather than trying to recall every meal I make, and place them in the slots for each day. So much quicker! This also allows me to see the ingredients needed at a glance, so I can use them to make my grocery list.

Since I made my meal planner I haven't put off planning the meals, it's much less taxing on my brain! And of course, I always love another excuse to hang some more pretty fabric somewhere. :-)

Tuesday, April 12, 2011

Coupon Organizer

This isn't exactly sewing-related, but it was an idea that I found helpful so I thought I'd share! I don't know about you, but I've often tried to get in the habit of using coupons to save a little money here and there. Usually what would happen is, I'd set the coupon in a pile of paper somewhere and forget about it. Or I'd finally get an accordian style coupon organizer, only to file coupons away and forget about them. Or I'd remember to use them but had the hardest time trying to look through all the coupons and find the one I'd need while at the store.

Well, a few months ago I got on a coupon kick again, determined to put them to good use! So I went in search of some better way to organize them, something that would help me be able to see what I had more easily. I went looking through the organizing stuff at Target, but all they had for coupons was the usual accordian type organizers. In a last ditch effort I walked down the photo album aisle, and picked up a small plastic photo album, the kind you might stick vacation photos in. Suddenly it hit me, this is what I'd been looking for! I could stick coupons in each page, and easily be able to flip through them to find the one I needed. So that's what I did!


I've separated my coupons into different sections in the album, restaurant coupons, sewing coupons, grocery coupons, specific Target coupons (I shop there often and print coupons they have available online weekly) and other, miscellaneous coupons. As soon as I get a new coupon, I place it in the album, and I keep it in my purse so it's always with me.

This has worked so well for me! I love the ease of using it at the store, I can flip through and see what I have quickly without trying to search through a pile of coupons and dropping them everywhere. In February, I saved almost $60 using my new system, and in March I saved more than $85! Typically it has saved me about 25-30% per shopping trip. Yay for saving money!

As a bonus, I slipped some fun paper I had in the cover to make it a bit prettier. :-)

Friday, August 28, 2009

New Dress!!

So I was itching to make something new, and recently I had a sudden desire to do some shirring. It looked simple enough and I had some elastic thread on hand. So, I dug through my stash and found a drapy polyester fabric I'd bought several yards of online at $1.99/yd quite a while ago, and figured I could play around with it.

I've seen a lot of dresses in stores lately that are basically just shirred on top, and long and flowy on the bottom...I even bought a couple! I figured something like that couldn't be too hard to make, it's just a big tube that's shirred on top. So I started out with the plan to do just that...but then, I was worried that the fullness I wanted on bottom would be hard to achieve, as I'd read that sometimes it's difficult to get the shirring as tight as you might want. So I decided to do some pleating in back, and shir a panel in the front to give it enough give to pull on. And besides, I just love the look of pleated stripes, how the hidden stripes cascade out from the pleats like a special surprise. :-)

I then added some sleeves, basically a long rectangle of fabric hemmed on the edges, and then ran a few rows of elastic stitches on one side so would ruffle up a bit and stay on my shoulders. Finally, I sewed a coordinating burgundy belt as an accent to make the dress pop, but also to help shape the dress in front, to pull in the fabric high on the waist.

Et voila. :-)


It's not hemmed in the pics, so it's a couple inches shorter now, but I do love the result! The best part is it was fairly simple to make, no cutting complicated shapes, just a long tube sewn together and pleated and shirred for shape. :-)

Saturday, July 18, 2009

The Milkmaid


I was making an apron for a cousin's wedding present and thought I was going to go one route, a double layered apron, something simple. I made up the top layer, but while I was kind of playing around with it I suddenly had an idea. The two fabrics I'd picked just didn't pop together, so I decided to set aside the top layer and use it for my new idea.

So once I finished my cousin's apron, going a slightly different route than I'd originally planned, I got to work on what I call the Milkmaid.

I love draping and swags of fabric, and I fell in love with how the top fabric looked draped a certain way. The apron is composed of two layers, the bottom layer is a half circle with a loose ruffle attached, the top layer is a half circle. At first I was going to sew the draped fabric in place, but then I realized I could make it more versatile by giving the option to leave it down or drape it. When the top layer is down, it just looks like a cute retro circle skirt like apron.


I sewed some ribbon loops along the waistband and added buttons on the skirt.


This allows the top layer to be easily draped, either on one or both sides to give that swaggered milkmaid look.


I really like the result, I think I'll be making some more of these in the near future! This one is up for sale in my shop now.

Monday, February 2, 2009

Petticoats!

A while back I ordered a simple cotton petticoat off of Etsy, trimmed with a lovely eyelet lace on the bottom. When I got it, it was longer than I had imagined...I still use it for several of my longer skirts, especially when it's cold outside! It really does help keep you warmer.

But since then, I've been wanting to make a shorter one to wear with some of my shorter (as in, calf-length) skirts, and with a bit more pouf to it!

I was as Walmart the other day browsing the $1.50 fabric section, and I found some...uh...I don't know, nylon something? I'm not quite sure what it is, lol, but it's synthetic and has a nice stiffness to it, and I thought it would make a great petticoat! I also grabbed some $1.50 tulle to accompany it.

So I figured a petticoat is simple enough, one tier of fabric big enough to go around the hips, elastic for the waist, then another tier or two with more fabric each time for fullness. This was my first attempt:


It's shorter than I had planned because I stopped at the second tier after realizing it was definitely poufy, but it was poufy all around and wasn't all that flattering with the kind of skirts I was planning on wearing it with. It kind of just made me look like I had a huge bottom half! I had also doubled the amount of tulle on the back rather than putting a single layer like I had on the front...


Needless to say, I underestimated tulle's pouf factor!

I thought a bit about where I wanted the fullness to be in the petticoat. I realized I wanted it on the sides and a bit in the back, but I didn't want it much in the front.

So I began again, this time making sure to gather the fabric mostly on the sides and a bit in the back, but to keep it flat in the front. And this was the result:


I'm quite pleased with the result, it's full in just the right places. It's amazing to me how this simple piece of underclothing can add so much! Here are some comparisons of a couple of my skirts with and without the petticoat.


Sunday, August 17, 2008

My Latest Idea...Victorian Inspired Apron!

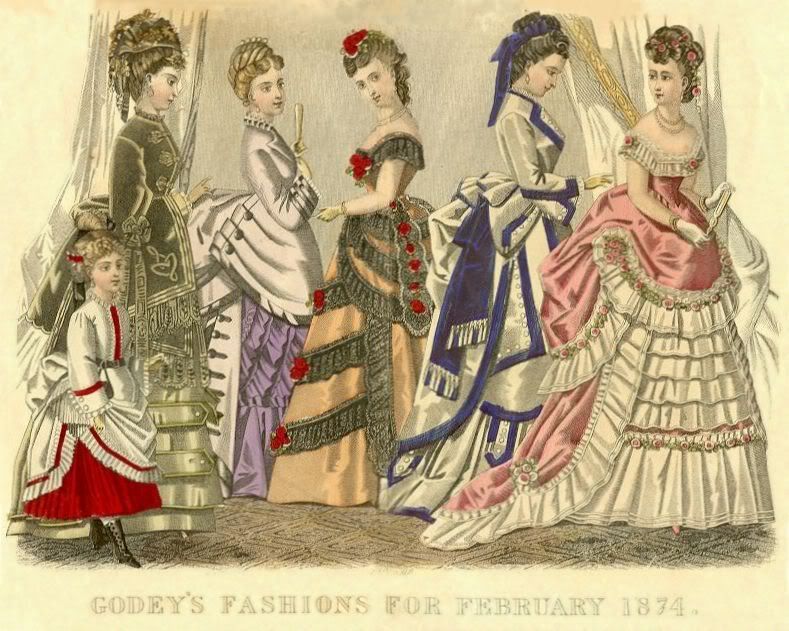
I've been taking advantage of the unlimited instant viewing on Netflix lately and enjoying many period films as I sew. Not surprisingly, seeing the gorgeous costumes inspired me to, once again, take some of my favorite period fashions and transform them into a practical excuse to play dress up! My latest apron is a Victorian inspired apron.

When I see Victorian fashion, I can stare at it for hours and lose myself in the massive amounts of fabric, pulled and gathered this way and that way, with the elaborate pleats peeking out, underskirts and overskirts and bustles and so many lovely layers all placed just so. It's like a magnificent yet controlled explosion of lush fabric, and so very beautifully feminine.


And so I thought about how to apply some of my favorite aspects of Victorian fashion to a practical apron, and this is the result.


It's composed of 3 layers, a kind of "petticoat" layer, the bottom layer, trimmed in a lovely little mini box pleat that peeks out from the bottom.


On top of that is an olive layer trimmed with some dainty lace and tucked here and there for some interesting texture, a small nod to the many textured layers of drapes and gathers seen on Victorian dresses.


And finally the topmost layer is an overskirt draped in the front and gathered towards the back, seen quite frequently on Victorian fashion plates.


As I couldn't exactly have a bustle on an apron, I opted for a nice big bow in the back.


I'm very pleased with the result, and this is just the first of more to come. :-)

It's up for sale now in my Etsy shop! It's sold!