Monday, June 17, 2013

Little Black Concert Dress (Butterick 5748)

I have a significant section of my closet that is aaallll black! Black tops, black skirts, black dresses. I didn't go through a goth phase or anything, lol, I've just been performing in concerts (band, orchestra, or choir) since I was around 10, and unless we had a uniform, concert dress was typically always black. I never miss a chance to dress up a bit, but I try to keep it understated. It can be hard to find a dress that isn't too formal or too casual for my liking, that is also comfortable enough to play my instrument in, and suitable for the concert setting. I like the traditional 3/4 sleeve, and I like the skirt long enough that I don't have to worry about any flashing going on. In short, I'm picky! And good choices in stores tend to be severely lacking.

 Since I've been on such a sewing spree lately, before my last orchestra concert I decided I would make myself a new concert dress! I looked through my stash, and decided on Retro Butterick 5748.


It's sleeveless, but I have several shrugs and bolero type cardigans to layer with it for my 3/4 sleeve preference.

I really love the simplicity of this dress, the scoop neckline, a basic bodice with darts, and a full circle skirt. I decided to make the view with the notch in the front neckline just for a little interest, but I didn't use the bows or have a notch in the back. I also decided to move the zipper from the side to the center back, so I could easily use an invisible zipper. And, as I'm a firm believer in pockets whenever possible, I added pockets as well.

This was the first time I was able to use my duct tape dress form (post on that coming soon), and it was a great help! Thanks to it, after fitting the pattern on it, I decided to alter the front bust darts to a diamond shape, so that it was a more fitted look. I also decided to go with a size smaller than the pattern suggests, taking the ease into account. I adore the pattern art on retro and vintage patterns, and it seems to me the only way to get anything close to that gorgeous silhouette is to fit the bodice as closely as possible. So with the help of my body double, that's what I did!

I actually decided to wear this to a ballet my husband took me to for my birthday, and I was sewing up until the last second. I wasn't able to finish the hem, but I decided to wear it anyway to the ballet, lol. So here I am after the lovely ballet, wearing my unhemmed dress!


And here are some pics of the final product, hemmed and all. ;-)


Sunday, June 9, 2013

Easter Dress 2013 (Butterick 6582)

When I was a little girl, Easter always meant a new dress! I still get the itch, when Easter comes around, to find that perfect spring-like dress for the occasion. This year, having recently acquired quite a pattern stash, and feeling more confident about using them, I decided I'd give making my own dress a shot. I thumbed through my Retro Repro patterns, and settled on Retro Butterick 6582.


I would, of course, be choosing the full-skirted version. ;-) One day maybe I'll feel bold enough to make a wiggle dress.

I chose this lovely pink and peach floral cotton, I thought it was very happy and it reminded me of spring! My husband said he thought it looked a little granny-ish, haha, but I figured that meant it would fit my old fashioned style dress.


 The pattern wasn't too difficult, I found the instructions to be pretty straight forward. As I always do whenever possible, I added a pocket. I also took the opportunity to practice my invisible zipper insertion skills, as I was getting ready to work on the wedding dress for my friend and needed as much practice as possible. It went in without issue, so I was pleased! This was how it looked before I joined the skirt and the bodice:


I decided I wanted a sash to go with it, so I used the sash from Retro Butterick 5032. And here I am ready to head off to the Easter Vigil!


I also considered wearing it with a pink sweater I had, and I've since worn it this way, but decided to go with the sash for Easter.


 I found a darling little vintage hat while browsing around after restocking my booth at Austin Gift Company. Only $8! I decided it was a little too pink all over, so I decided to add some of the fabric I used for the sash to tie it all together. Here are some close ups of the hat, and the hair.


It was a lovely Easter vigil, and I got several compliments on my ensemble from strangers, which is always fun. ;-) Not too shabby for my second retro dress from a pattern! Each one completed has given me more confidence, and makes me look forward to tackling the next one.


Saturday, June 1, 2013

Patterns Galore!

Hello friends! So since my last post, I've been super busy sewing up a storm, and actually using patterns! Can you believe it? I feel like I've finally gotten the hang of it, which is extremely exciting since it opens up so many possibilities. I hit a couple of the 5/$5 pattern sales, as well as taking advantage of a liquidation sale at one of my local Joann's which moved (closer to me, yay!) So I have quite a stash now, mostly of the reproduction retro type, and I'm so excited to work through them. :-)


I thought it would be fun to start blogging about what I'm making, so that's the plan! Since the Walkaway dress, I've made an Easter dress, a black concert dress, a blue hybrid-pattern sundress, AND a wedding dress! I'll be blogging about all of them soon, and hopefully will have more to come. I also made a duct tape dress form which has been such a big help in fitting myself. Lots to catch up on, can't wait to share!

Sunday, November 18, 2012

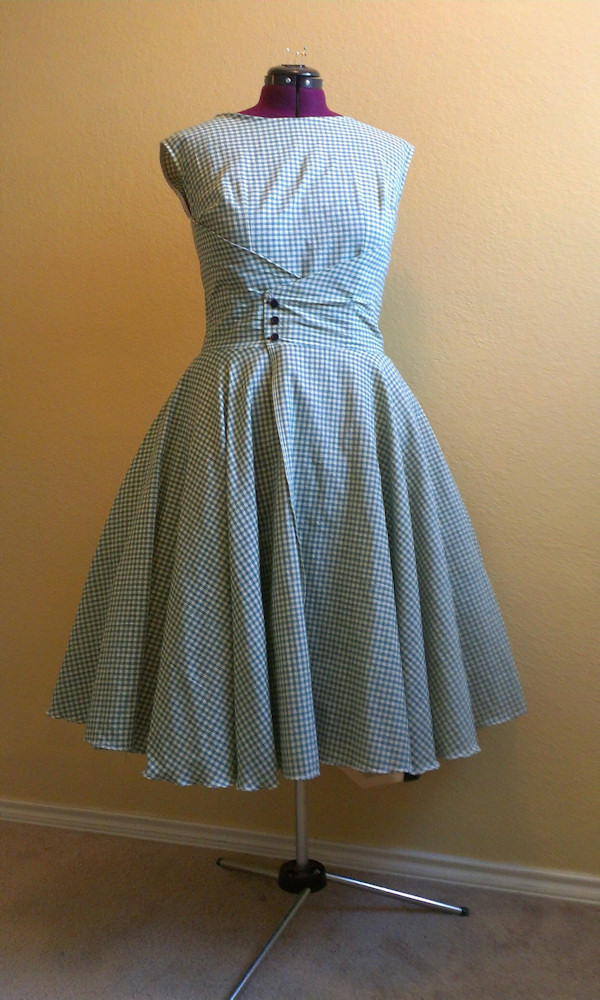
The Walkaway Dress - Retro Butterick 4790


Well clearly I haven't been busy blogging, but I have been busy sewing! I've been trying to build up my Etsy stock for the upcoming Christmas rush. Amidst all that, though, somehow I found time to make myself a dress, with a pattern! Look at me, using patterns like a real seamstress...I almost feel like I know what I'm doing. ;-)
 
So I was at Joann's during a $1.99 Butterick pattern sale, and decided to flip through the book and saw their retro pattern 4790. I'd just been reading some mixed reviews on it, but I figured for $1.99 why not give it a try?
 
What makes this dress so interesting is that, first it's supposed to be very quick and easy to put together (which I think it was!), there are only 3 pattern pieces, nice right? The other thing is how it is worn, but we'll get to that in a minute.
 
A lot of people had fit issues with this dress, so after reading as much as I could online, I ended up using Katrina's alterations outlined in her sewalong. I was very happy with the results!


(The buttons are off center because my dress form is smaller than me, lol, and do forgive my wonky hem. I was in quite a hurry when I did it, trying to finish the dress in time to wear it out. I may try to do a better job when I get a chance!)
 
The pattern itself has you using bias tape on all the edges, and while I love using bias tape, I didn't particularly care for the look it gave the dress, so I was thrilled to use Katrina's instructions for sewing bias tape to the inside! I'm definitely going to be using this trick again and again, love it!
 
So as you can see below, the back of the dress wraps around in front, making a kind of overskirt.

 
What you can't see as well is that underneath that, the front part of the dress wraps around and fastens in the back, making a kind of sheath dress underneath.

 
So, here I've fastened the back, so you can see how it looks underneath before fastening the front.

 
So then I pull in one side...

 
And button the front, et voila!
 
 
I took Katrina's advice and made a special petticoat as well for the dress, which slips on over the sheath, as you can see here.

 
All in all, I was pleasantly surprised at how comfortable it was to wear. A lot of people complained of it slipping/sliding to the back, due to the weight of the skirt. I didn't find that to be too much of an issue, I think it helps if it is fitted very snugly. I also wore a slip under the sheath part to help avoid riding up as I walked, as well as a shrug (did you see my farmer's tan? My goodness I'm pale, lol!) partly to make sure I didn't flash any bra on the sides. If I wore it without a shrug, I'd probably pin the sides just to be safe.
 
It's certainly a very fun dress to make, and to wear! I definitely recommend it (with Katrina's alterations) and I can't wait to find time to make another one. :-)


Wednesday, June 27, 2012

New Design - The Tie Back Smock


Hello everyone! So I was struck with an idea recently and just made my first prototype. I'd been looking at retro style smocks that tie in the back, and thought they were adorable. Problem is, I'm lazy and I really don't like weirdly shaped scraps, haha. My favorite projects and patterns are ones where I can cut quick strips and rectangles with my rotary cutter! So the wheels started turning and I came up with a new design, what I call the Tie Back Smock. Here it is!


Isn't it cute? When untied, it's just a simple, loose smock that buttons in the back.


Tie a pretty bow and it cinches the waist right in.


Simple and made by cutting with straight lines only! This one will be up for sale in my Etsy shop shortly. :-)

Saturday, February 11, 2012

Exciting Announcement!

So I just wanted to pop in and share that some of my creations are now being sold in a local store here in Austin! Isn't that awesome? It's such a cool store where local artisans set up booths, you can find all kinds of great stuff, handmade, vintage, quirky, fun...you name it! And now I have a booth of my own. :-) Here's a quick pic I took with my phone!


I'm excited to see how it works out, whatever happens it has been a blast to set up and it's just plain cool to see my stuff in a real store, hehe. Any locals who are interested, it's the Austin Gift Company on South Lamar, close to Target.

On another note, I hope to put up a new simple, easy fun tutorial very soon! Just need to get all my pics sorted out, so stay tuned. :-)

Tuesday, January 17, 2012

Tidying Up

As I mentioned in my last post, I'm always at my most creative when everything is neat and tidy. I just love for everything to have a home, especially if that home is arranged by color, hehe. During the frenzy of making Christmas orders and Christmas gifts, often my leftover scraps and bits get thrown in a pile once I'm done so I can start on the next project ASAP. I really hate doing that, and when I'm not in such a hurry I usually clean up in between projects, but I just didn't have time. So I was eager to get started on cleaning up my crafting room after the flurry of activity.

You've seen my fabric shelf before, I've done well keeping it nice and tidy. My next project, I decided, was going to be my crafting closet. I keep all my crafting supplies in here, but they had grown and it just looked like a mess. Here are some before pics:


So I went to Ikea and got some nice new drawers!


I separated everything by category and moved things around a bit, and here is my newly organized closet:


I love it! It makes me smile, AND seeing my room all neat and clean and my supplies all organized gives me that itch to create something. Can't wait to share whatever that ends up being with you. :-)