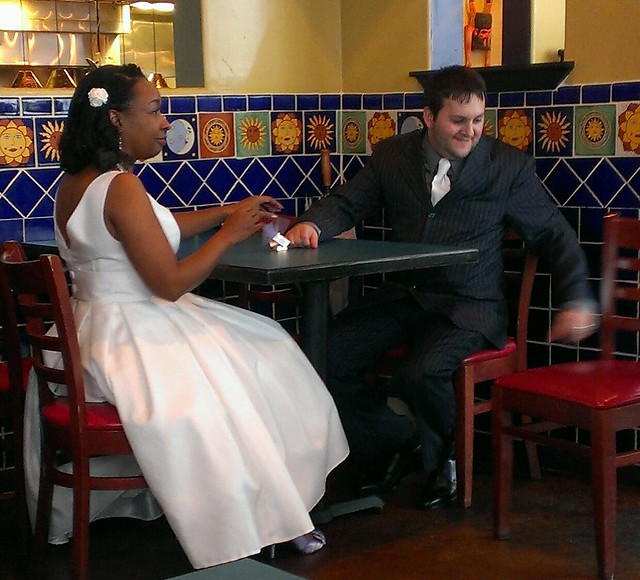
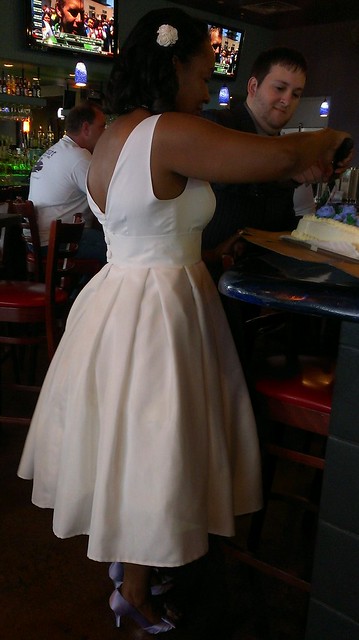
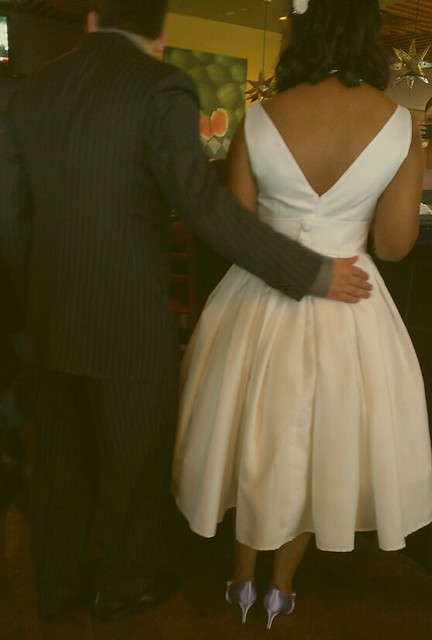
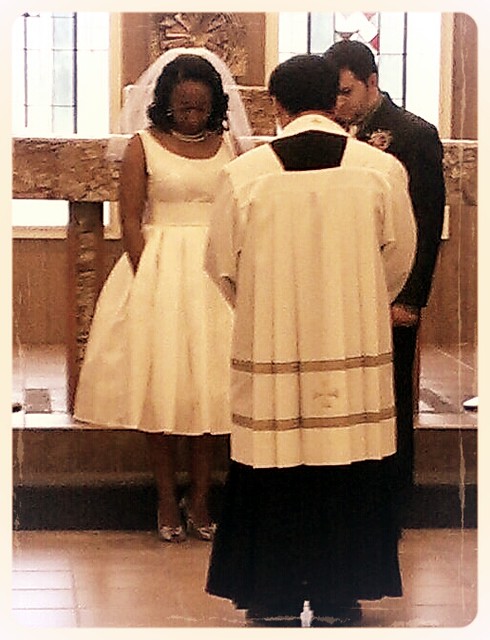
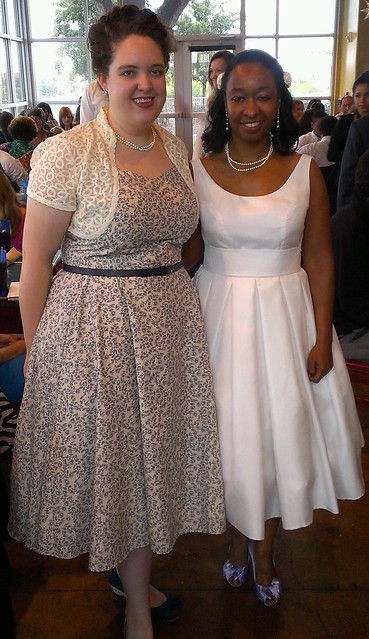
Last year, my friend Robyn sent me a picture of an adorable 50s tea length dress and asked if I knew anyone that could recreate it for her upcoming wedding, or if I would be able to. At that point, I still hadn't used many patterns, and I had never fitted anyone other than me for a dress. So my first reaction was, there's no way I'm experienced enough yet to make such an important dress! However, I absolutely fell in love with the dress she had chosen, and I just had a strong urge to say yes anyway to challenge myself, and so I did.
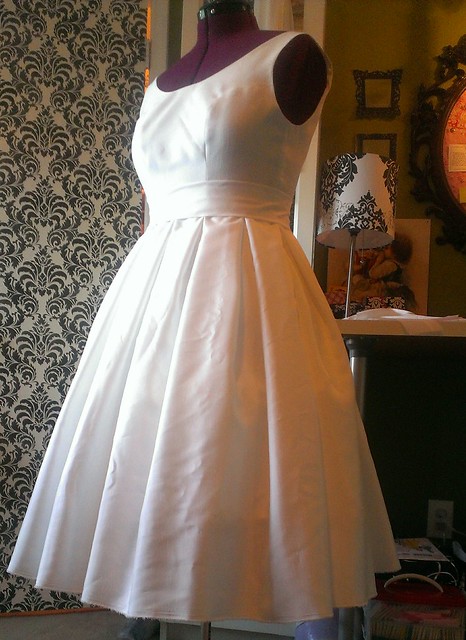
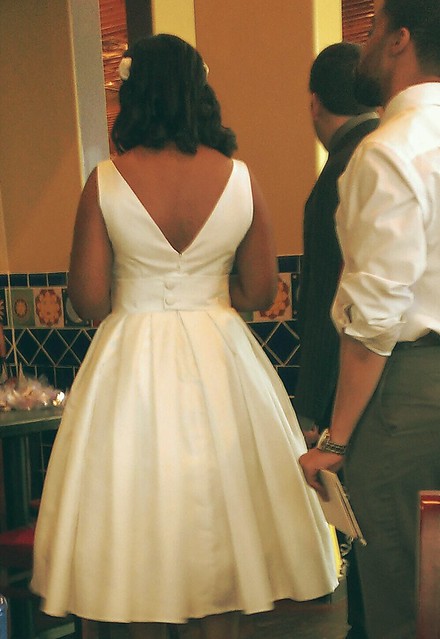
The dress she wanted had a simple, sleeveless, fitted bodice with a scoop neck and low V back. The full tea length skirt was made with box pleats, which I love and knew I could do for sure, it was just getting a lovely fit on the bodice that had me a bit nervous. I decided to find a pattern with a simple bodice that could be easily altered as a starting point. So we went to the fabric store together, flipped through the pattern books, and settled on Butterick 5748. In hindsight, that probably wasn't the best choice, but more on that later.
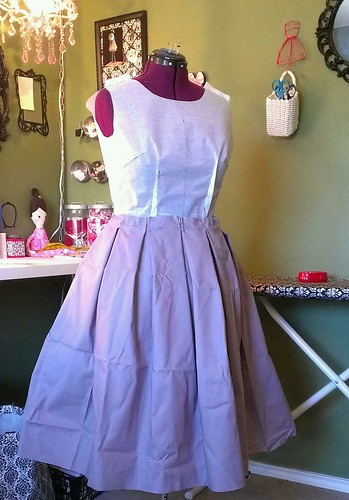
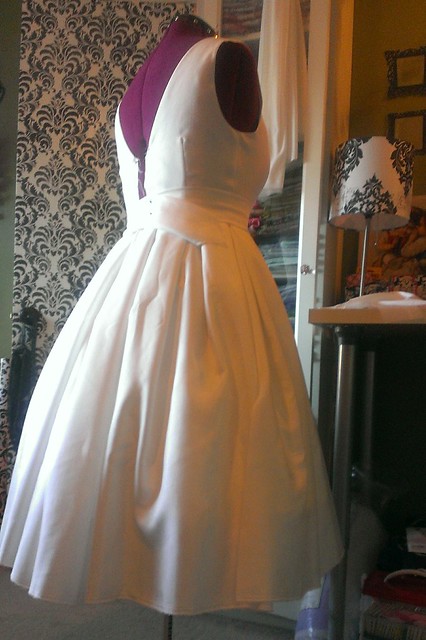
I sewed up a quick version of the bodice and altered the neckline to make a deeper scoop in front and to be a V in back. I pleated and pinned some broadcloth on my dress form just to get an idea of the whole look together.
At the first fitting, I was mainly looking to see if my neckline alterations were going to work, and they looked pretty good! But the rest of the fit was kind of a mess. The bodice needed to be shortened significantly, by a couple inches. Also, the fit was not as form fitting as I'd hoped. I now realize that the pattern we chose is not meant to be extremely form fitting, so that was probably not the best choice. But I adjusted the darts under the bust to be more diamond shaped in an attempt at getting a closer fit.
The next round of fitting seemed to go pretty well, I made two versions of the bodice with two different sets of alterations, and one seemed to do the trick. I figured I was ready now to make it with the real fabric!
So I made up the bodice in the fabric itself, and it looked great on my dress form, but I was a bit disheartened to see it did not look so great on my bride. The darts were not very flattering at all and seemed much more apparent in this fabric than the toiles I'd made up.
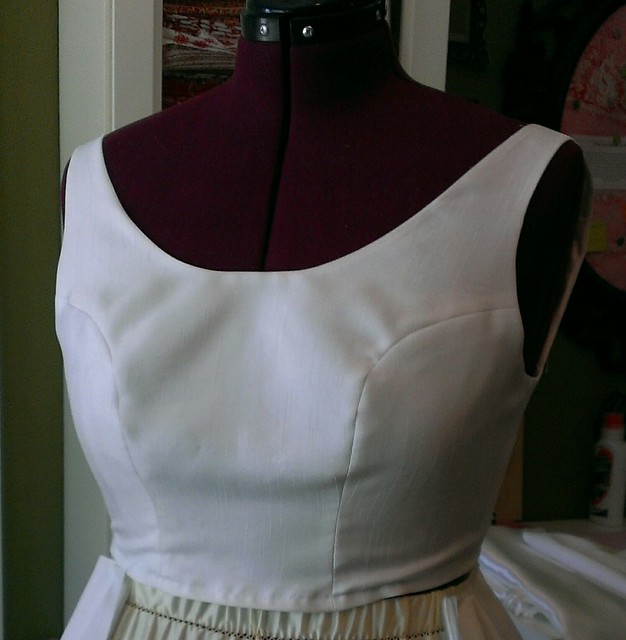
I did some research, and realized I would likely be having much better luck with princess seams than with darts. So I found a couple tutorials on converting darts to princess seams, and went at it. I worked on it late into the evening, and had Robyn come back the next day hoping this would do the trick. I was amazed at the difference it made, the fit was so much better, exactly what we were looking for! (Princess seams weren't pressed yet in this pic!)
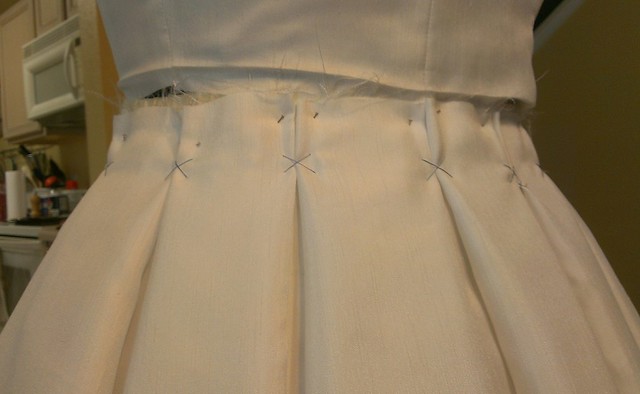
Once I had the bodice done, I started working on the skirt. I must have re-pleated the skirt 4 or 5 times, trying to get the pleats just right. Robyn left her petticoat with me so I could make sure the skirt fell nicely over it. I pinned the the pleats on my dress form, and then hand stitched them together with cross stitches once I was satisfied to make it easier to sew to the bodice.
Finally, my bodice and skirt were attached and looking very much like I'd hoped! It was all pretty exciting. I whip stitched the lining to the skirt, trying my best to make it look as pretty as possible on the inside.
I inserted an invisible zipper once I measured several times to make sure the fit was good, and then I hemmed it with a very small hem after deciding on the exact length for her.
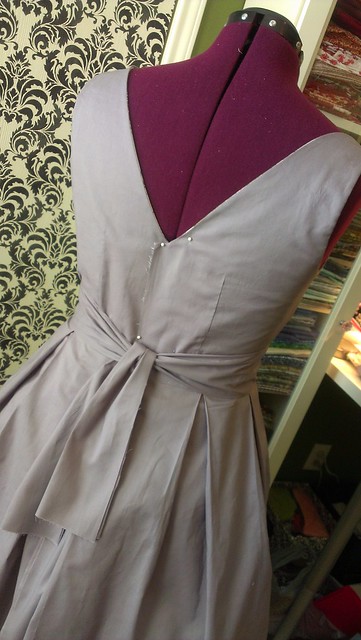
The last part of the dress was making a wide belt that closed with two fabric covered buttons in the back. My first attempt fit well, but the seam was slightly visible as a bump in the middle. The second attempt ended with a strange wrinkling across the belt when it was pulled. I had cut the fabric and the interfacing on the bias, same as the first time, but for some reason something went wrong! So I made a 3rd belt, which was just right, except for the buttons needing to be repositioned after somehow not measuring carefully enough and making the belt a tad too loose. Finally, after many hours of back and forth to my place and her place, about 3 days before the wedding (cutting it close much?!?!?!) everything was completely finished.
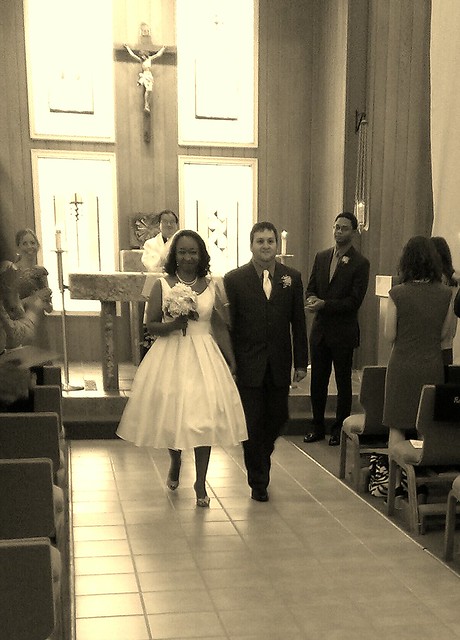
The bride looked beautiful on her wedding day, and I was so pleased that she was pleased!
Oh, did I mention there were pockets? They came in handy for those inevitable tissues needed for happy tears. :-)
I also made the groom's tie using this tutorial, which was a first for me as well.
I learned a lot through this whole process, especially about fitting, and I'm thankful to my friend for having faith in my abilities and trusting me with such an important garment. It was an honor to create!
Thursday, July 11, 2013
Monday, June 17, 2013
Little Black Concert Dress (Butterick 5748)
I have a significant section of my closet that is aaallll black! Black tops, black skirts, black dresses. I didn't go through a goth phase or anything, lol, I've just been performing in concerts (band, orchestra, or choir) since I was around 10, and unless we had a uniform, concert dress was typically always black. I never miss a chance to dress up a bit, but I try to keep it understated. It can be hard to find a dress that isn't too formal or too casual for my liking, that is also comfortable enough to play my instrument in, and suitable for the concert setting. I like the traditional 3/4 sleeve, and I like the skirt long enough that I don't have to worry about any flashing going on. In short, I'm picky! And good choices in stores tend to be severely lacking.
Since I've been on such a sewing spree lately, before my last orchestra concert I decided I would make myself a new concert dress! I looked through my stash, and decided on Retro Butterick 5748.
It's sleeveless, but I have several shrugs and bolero type cardigans to layer with it for my 3/4 sleeve preference.
I really love the simplicity of this dress, the scoop neckline, a basic bodice with darts, and a full circle skirt. I decided to make the view with the notch in the front neckline just for a little interest, but I didn't use the bows or have a notch in the back. I also decided to move the zipper from the side to the center back, so I could easily use an invisible zipper. And, as I'm a firm believer in pockets whenever possible, I added pockets as well.
This was the first time I was able to use my duct tape dress form (post on that coming soon), and it was a great help! Thanks to it, after fitting the pattern on it, I decided to alter the front bust darts to a diamond shape, so that it was a more fitted look. I also decided to go with a size smaller than the pattern suggests, taking the ease into account. I adore the pattern art on retro and vintage patterns, and it seems to me the only way to get anything close to that gorgeous silhouette is to fit the bodice as closely as possible. So with the help of my body double, that's what I did!
I actually decided to wear this to a ballet my husband took me to for my birthday, and I was sewing up until the last second. I wasn't able to finish the hem, but I decided to wear it anyway to the ballet, lol. So here I am after the lovely ballet, wearing my unhemmed dress!
And here are some pics of the final product, hemmed and all. ;-)
Sunday, June 9, 2013
Easter Dress 2013 (Butterick 6582)
When I was a little girl, Easter always meant a new dress! I still get the itch, when Easter comes around, to find that perfect spring-like dress for the occasion. This year, having recently acquired quite a pattern stash, and feeling more confident about using them, I decided I'd give making my own dress a shot. I thumbed through my Retro Repro patterns, and settled on Retro Butterick 6582.
I would, of course, be choosing the full-skirted version. ;-) One day maybe I'll feel bold enough to make a wiggle dress.
I chose this lovely pink and peach floral cotton, I thought it was very happy and it reminded me of spring! My husband said he thought it looked a little granny-ish, haha, but I figured that meant it would fit my old fashioned style dress.
The pattern wasn't too difficult, I found the instructions to be pretty straight forward. As I always do whenever possible, I added a pocket. I also took the opportunity to practice my invisible zipper insertion skills, as I was getting ready to work on the wedding dress for my friend and needed as much practice as possible. It went in without issue, so I was pleased! This was how it looked before I joined the skirt and the bodice:
It was a lovely Easter vigil, and I got several compliments on my ensemble from strangers, which is always fun. ;-) Not too shabby for my second retro dress from a pattern! Each one completed has given me more confidence, and makes me look forward to tackling the next one.
I would, of course, be choosing the full-skirted version. ;-) One day maybe I'll feel bold enough to make a wiggle dress.
I chose this lovely pink and peach floral cotton, I thought it was very happy and it reminded me of spring! My husband said he thought it looked a little granny-ish, haha, but I figured that meant it would fit my old fashioned style dress.
The pattern wasn't too difficult, I found the instructions to be pretty straight forward. As I always do whenever possible, I added a pocket. I also took the opportunity to practice my invisible zipper insertion skills, as I was getting ready to work on the wedding dress for my friend and needed as much practice as possible. It went in without issue, so I was pleased! This was how it looked before I joined the skirt and the bodice:
I decided I wanted a sash to go with it, so I used the sash from Retro Butterick 5032. And here I am ready to head off to the Easter Vigil!
I also considered wearing it with a pink sweater I had, and I've since worn it this way, but decided to go with the sash for Easter.
I found a darling little vintage hat while browsing around after restocking my booth at Austin Gift Company. Only $8! I decided it was a little too pink all over, so I decided to add some of the fabric I used for the sash to tie it all together. Here are some close ups of the hat, and the hair.
Saturday, June 1, 2013
Patterns Galore!
Hello friends! So since my last post, I've been super busy sewing up a storm, and actually using patterns! Can you believe it? I feel like I've finally gotten the hang of it, which is extremely exciting since it opens up so many possibilities. I hit a couple of the 5/$5 pattern sales, as well as taking advantage of a liquidation sale at one of my local Joann's which moved (closer to me, yay!) So I have quite a stash now, mostly of the reproduction retro type, and I'm so excited to work through them. :-)


I thought it would be fun to start blogging about what I'm making, so that's the plan! Since the Walkaway dress, I've made an Easter dress, a black concert dress, a blue hybrid-pattern sundress, AND a wedding dress! I'll be blogging about all of them soon, and hopefully will have more to come. I also made a duct tape dress form which has been such a big help in fitting myself. Lots to catch up on, can't wait to share!


I thought it would be fun to start blogging about what I'm making, so that's the plan! Since the Walkaway dress, I've made an Easter dress, a black concert dress, a blue hybrid-pattern sundress, AND a wedding dress! I'll be blogging about all of them soon, and hopefully will have more to come. I also made a duct tape dress form which has been such a big help in fitting myself. Lots to catch up on, can't wait to share!

